Mobile Message & Make.com Integration

Integrating the Mobile Message API with Make.com (formerly Integromat) allows you to effortlessly automate SMS workflows. With Make.com’s drag-and-drop interface—offering over 2,000 integrations to services like HubSpot, Zoho, Salesforce, Google Calendar, Gmail, and Microsoft Dynamics 365—you can:
- Easily send automated SMS messages to customers, leads, or team members.
- Receive inbound messages with real-time webhooks, triggering follow-up actions automatically.
- Connect SMS notifications to other apps or services, saving time and reducing manual effort.
The guides below provide step-by-step instructions for two key tasks:
- Sending SMS using the Mobile Message API in Make.com.
- Processing inbound SMS messages via Make.com webhooks.
By following these guides, you’ll be able to set up reliable, scalable messaging flows without writing complex code. Whether you’re managing marketing campaigns, operational alerts, or customer support interactions, Mobile Message and Make.com together provide a powerful solution that keeps your communication both efficient and personal.
How to Send SMS with the Mobile Message API and Make.com
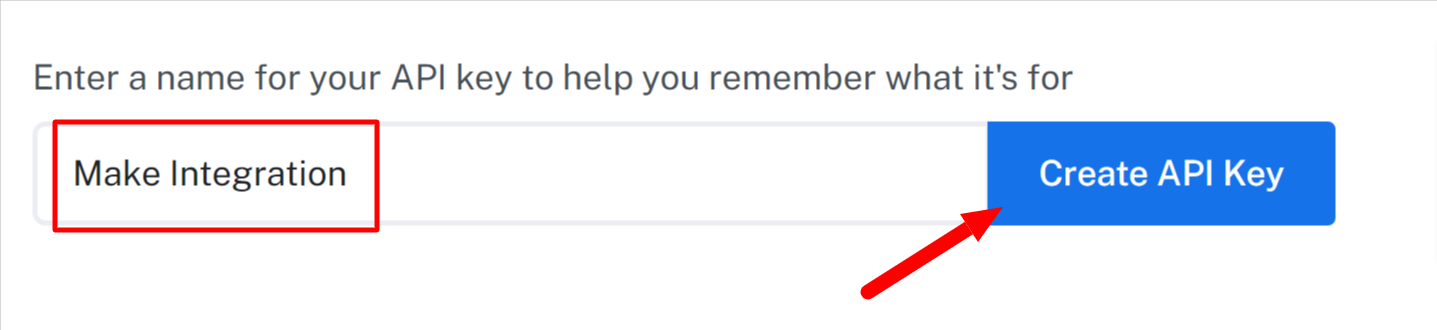
1. Get Your API Credentials
- Log into your Mobile Message account at https://app.mobilemessage.com.au/.
- Click Settings > API.
- Create a new API key and copy your Username and Password. Keep these stored securely for later use.
2. Set Up a New Scenario in Make.com
- Go to your Make.com dashboard.
- Click Scenarios, then select Create a new scenario.
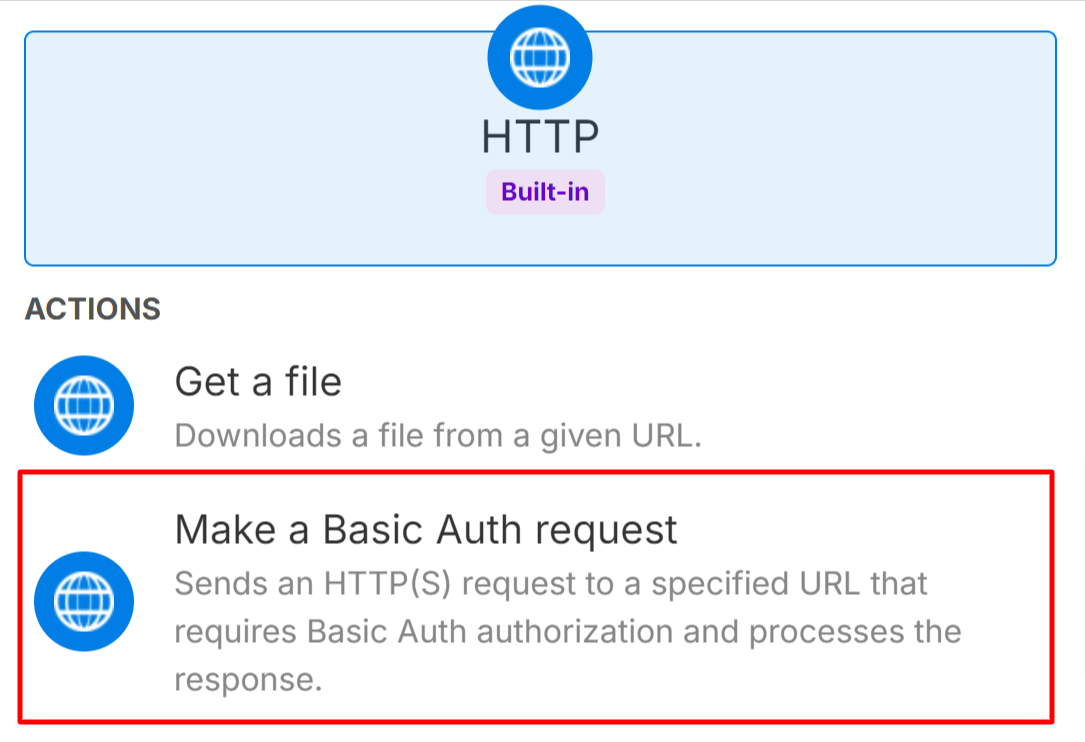
- In the module search bar, type HTTP and choose the module labeled HTTP.
- Click Make a Basic Auth Request.
3. Configure the HTTP Module
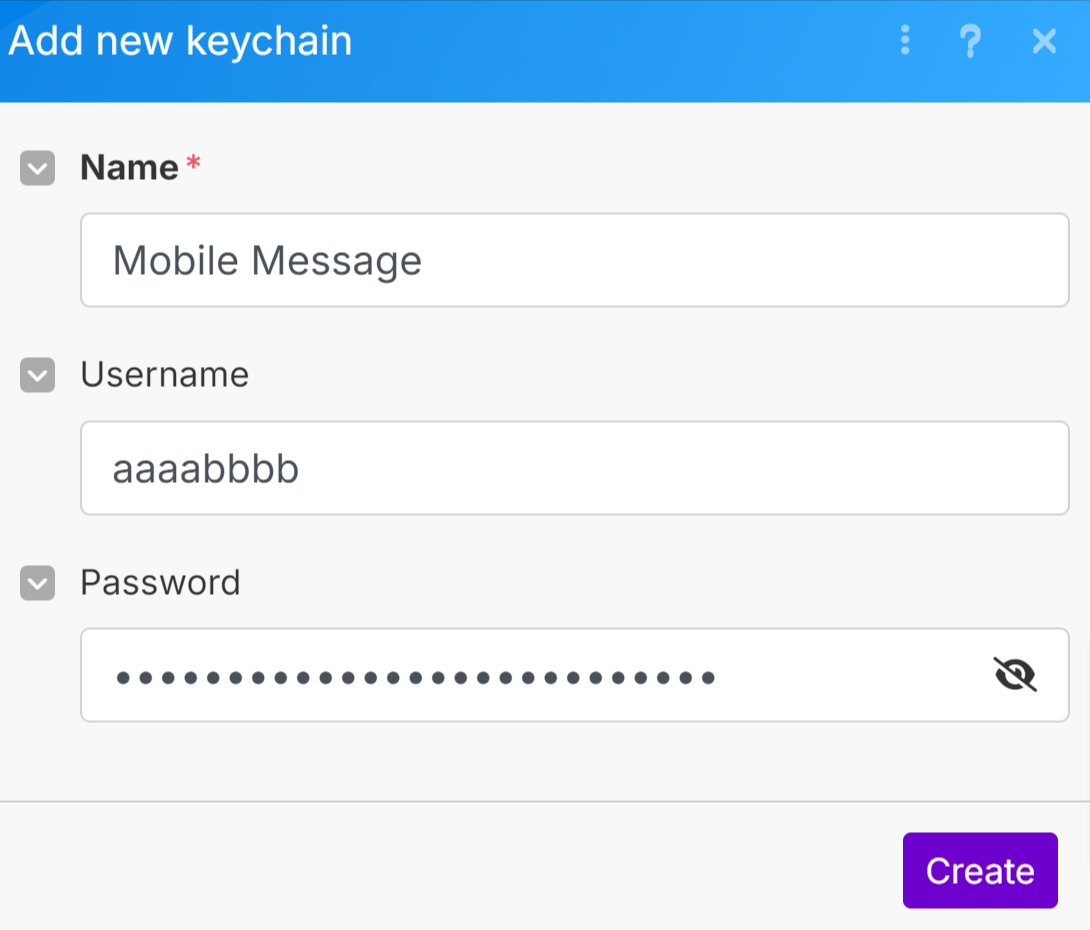
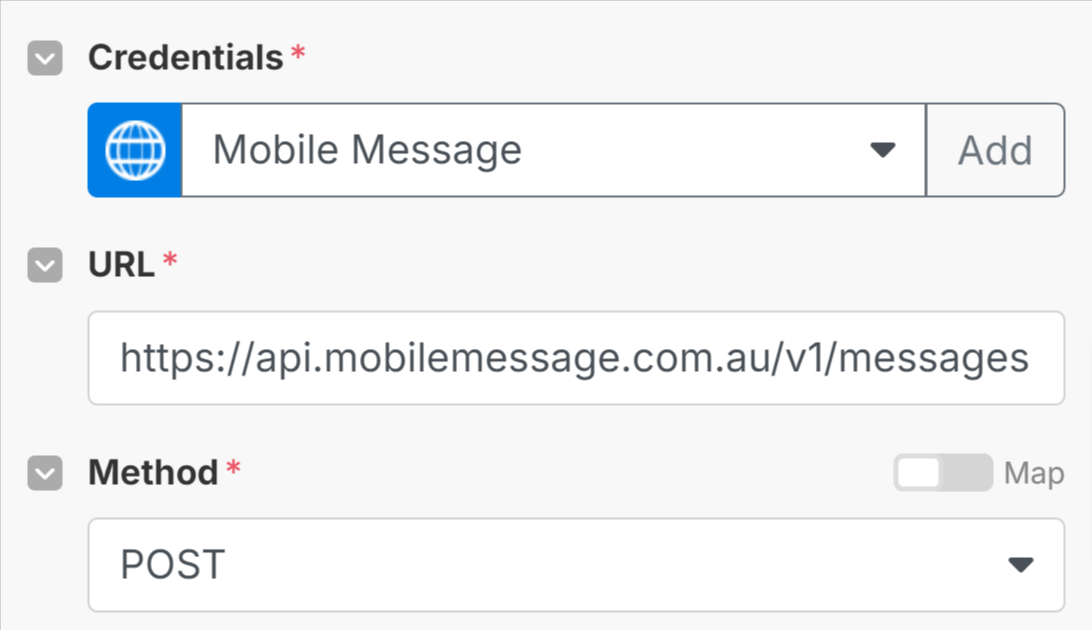
- Under Credentials, click Add.
- Enter a name (e.g., "Mobile Message") and add the Username and Password you copied in step 1. Then click Create.
- In the URL field, enter
https://api.mobilemessage.com.au/v1/messages. - Set the Method to POST.
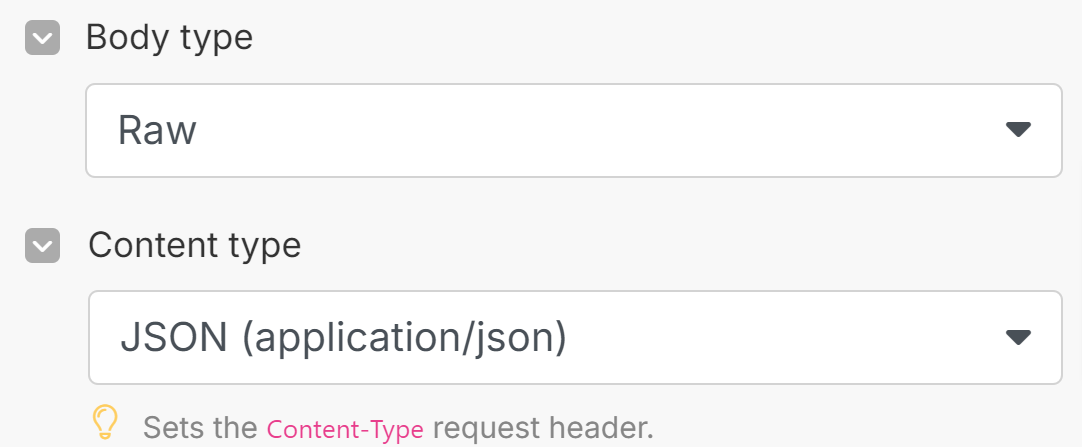
- Set the Body type to Raw.
- Set the Content type to JSON.
- In Request content, provide the JSON payload. For example:
{
  "messages": [
    {
      "to": "0412345678",
      "message": "Hello, this is a test message from Make.com",
      "sender": "MyBusiness",
      "custom_ref": "ref001"
    }
  ]
}
Update the request as needed and make sure the sender matches a pre-registered Sender ID from your Mobile Message account.
4. Use Dynamic Data (Optional)
If you have data from previous modules, map those fields to build the request dynamically.
Example: Suppose you have a Google Sheets module that supplies a phone number and a message. You can map the data from that module into the HTTP request body. For instance, imagine your Sheet has columns for PhoneNumber, MessageText, and OrderId. You could structure your Make.com request content like this:
{
  "messages": [
    {
      "to": "{{PhoneNumber}}",
      "message": "{{MessageText}}",
      "sender": "MyBusiness",
      "custom_ref": "{{OrderId}}"
    }
  ]
}
Make.com’s variable mapping features allow you to dynamically replace these placeholders with actual values from your data source.
5. Test Your Scenario
- Click Run once.
- Ensure you receive a successful response and verify that the SMS arrives on your phone.
6. Schedule or Trigger Your Scenario
- Configure a schedule to run this scenario at regular intervals, or connect it to another module that will trigger it when new data appears.
- Save and activate your scenario.
You are now using Make.com to send SMS messages with Mobile Message!
Processing Inbound Messages from the Mobile Message API with Make.com
Below is a guide to set up inbound SMS handling in Make.com, using webhooks.
1. Set Up a Webhook URL in Make.com
- In Make.com, create a new Scenario or edit an existing one.
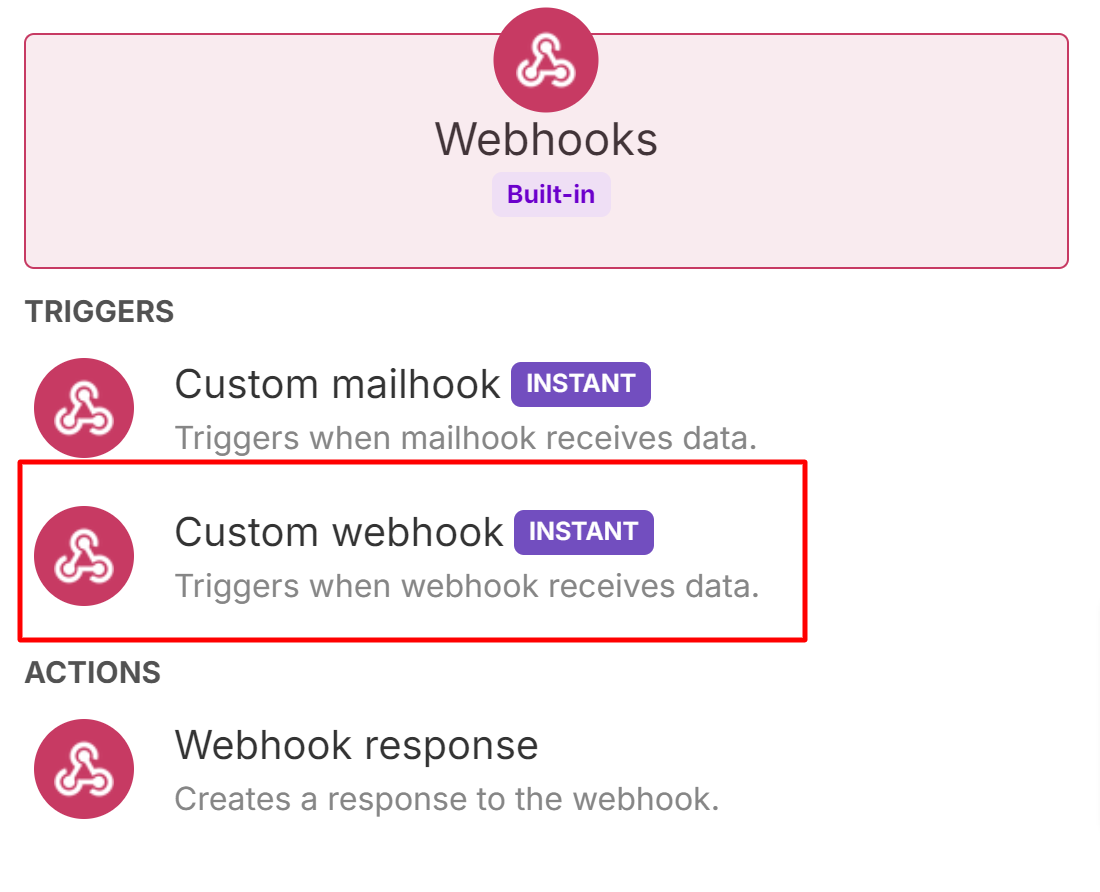
- Add a new module and choose Webhooks.
- Select Custom webhook.
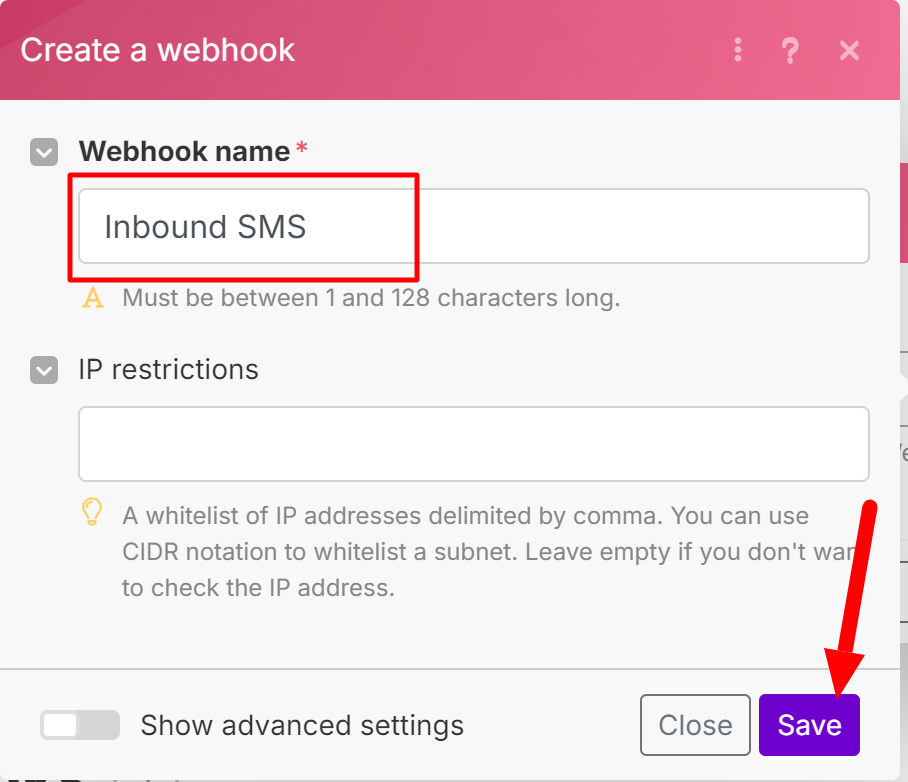
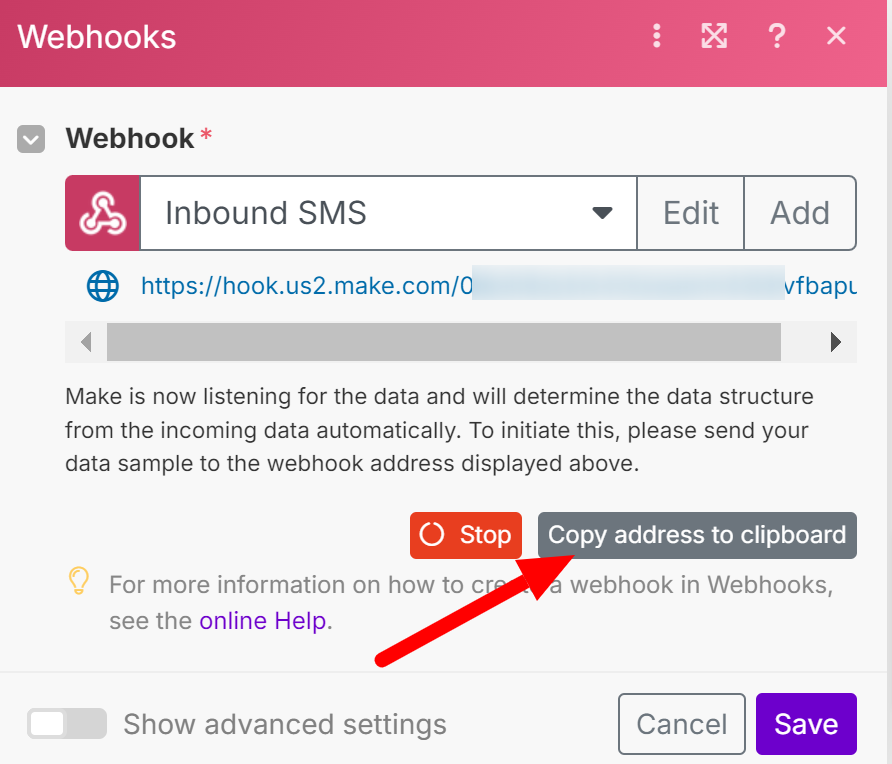
- Click Create a webhook, then give your webhook a name (e.g., "Inbound SMS"), and click Save.
- Make.com will provide you with a unique webhook URL. Copy that URL.
2. Configure the Inbound Message Webhook in Mobile Message
- Log in to your Mobile Message account at https://app.mobilemessage.com.au/.
- Go to Settings > API.
- Find the Inbound Message Webhook field and paste the unique URL from Make.com.
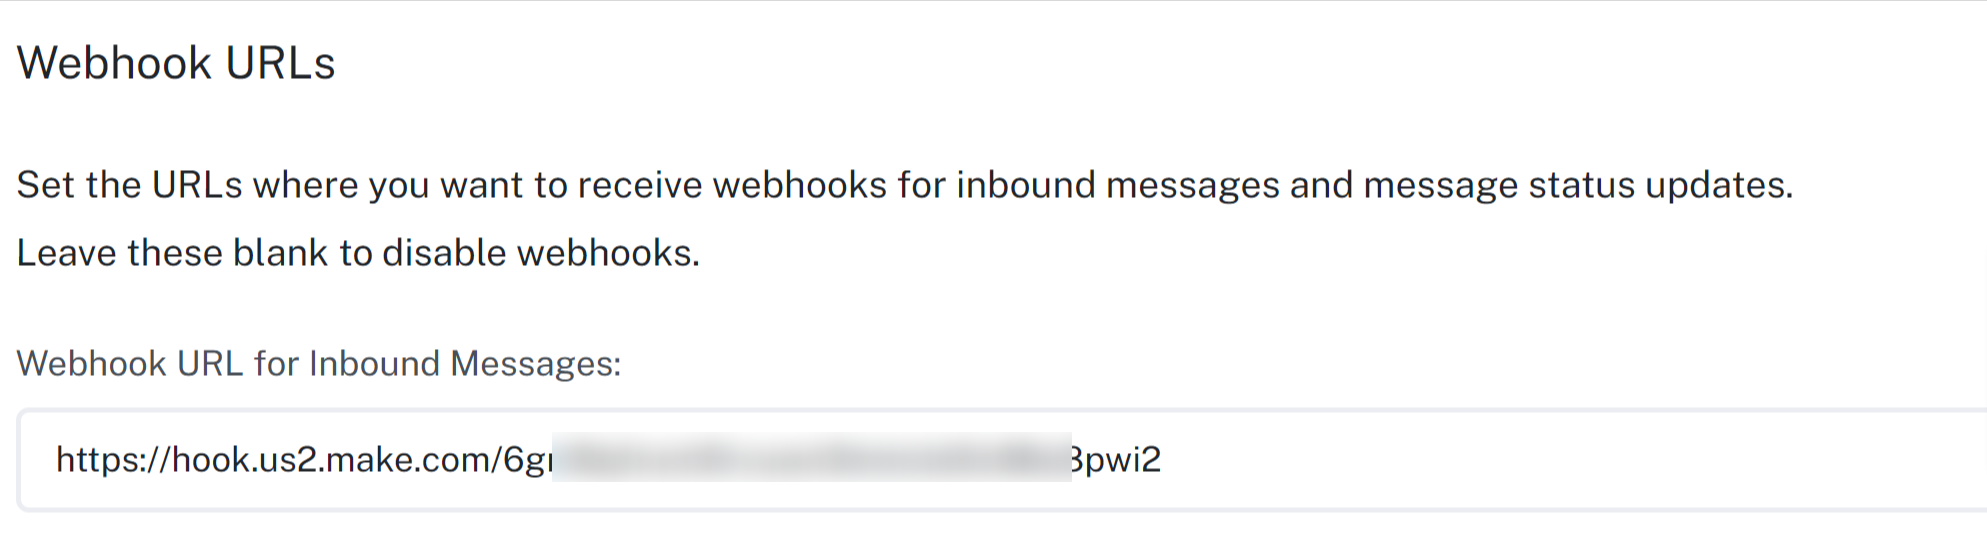
- Save your changes.
3. Test Receiving an Inbound SMS
- In your Make.com scenario, ensure that the Webhook module is the first module.
- Click Run once to start listening.
- Send a test SMS message from your phone by replying to a message that was sent from a two-way or dedicated number.
- Mobile Message will forward that inbound message to Make.com via the webhook URL.
- Make.com should show a successful webhook receipt.
Process the Inbound Data
The payload from Mobile Message might look like this:
{
  "to": "0412345678",
  "message": "Hello, this is an inbound message",
  "sender": "0412345679",
  "received_at": "2024-09-30T14:35:00Z",
  "type": "inbound"
}
In Make.com, you can now add subsequent modules to process or store this data, such as creating a row in a Google Sheet, sending an email notification, or triggering other workflows.
Schedule or Activate Your Scenario
- Once you’ve set up your workflow steps, save your scenario.
- To receive inbound messages in real time, ensure the scenario is enabled.
With this setup, whenever an SMS comes into your Mobile Message account, it’s forwarded to your Make.com webhook in real time. From there, you can perform any actions or integrations you need.