Using Mobile Message with GoHighLevel
Learn how to integrate Mobile Message with GoHighLevel to send and receive SMS messages. This guide covers setting up API credentials, adding webhook actions in workflows, automating outbound SMS, capturing inbound replies, and tracking delivery status.

Mobile Message can be connected to GoHighLevel (HighLevel) to send and receive SMS messages directly inside your workflows. This lets you automatically send booking confirmations, reminders, follow-ups, or marketing messages, and also capture replies from your customers back into HighLevel. The setup is quick and only requires your API details and sender ID from Mobile Message.
Time to setup: around 20 minutes.
Prerequisites
- Get your Mobile Message API credentials
Log in to https://app.mobilemessage.com.au → Settings → API → Create API Key (if needed). Copy your API Username and API Password. - Note your SMS sender ID
Go to Settings → Sender IDs and pick the registered Sender ID or dedicated number you’ll send from.
Part A — Send SMS from a HighLevel workflow
- Create or open a workflow
In HighLevel, go to Automations → Workflows. Create a new workflow or open an existing one. Add your trigger (for example, form submitted, tag added, appointment booked). - Add the Webhook action
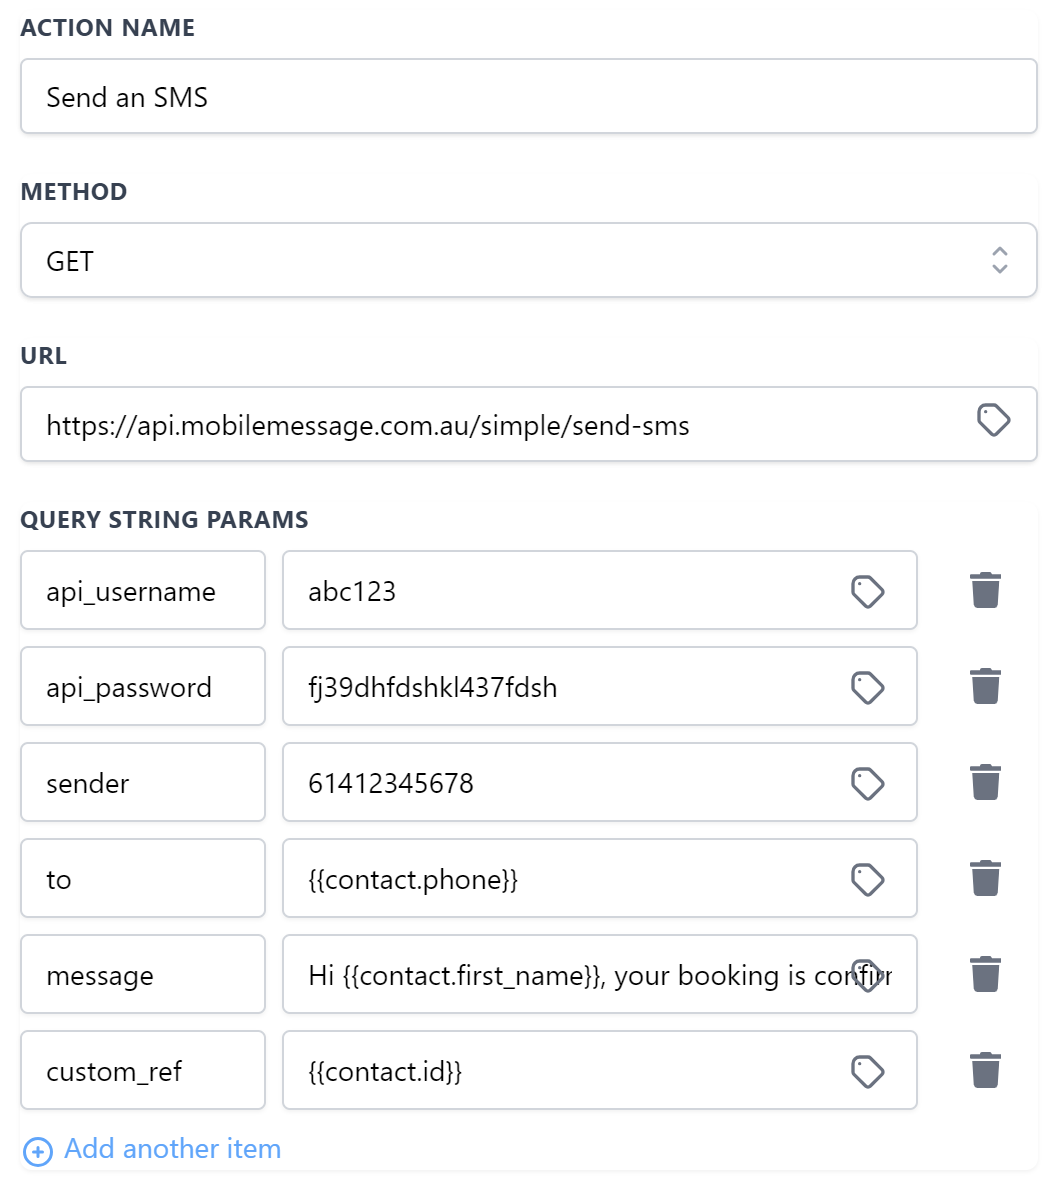
Click + Add Action → Webhook. - Configure the Webhook
- Method: GET
- URL: https://api.mobilemessage.com.au/simple/send-sms
- Add these query parameters:
- api_username → your API username
- api_password → your API password
- sender → your registered Sender ID or dedicated number (for example, 61412345678 or MyBusiness)
- to → the contact’s phone from HighLevel
- example: {{contact.phone}}
- message → your text (you can use merge fields)
- example: Hi {{contact.first_name}}, your booking is confirmed.
- custom_ref → a reference you want to track
- examples: {{contact.id}} or {{appointment.id}}
- Save and test
Save the workflow, then click Test Workflow. Choose a contact, run the test, and check the execution log and your Mobile Message account for the send. - Publish
Turn the workflow on. Run a live test if needed.
Tip: To avoid pasting credentials in multiple places, consider storing api_username and api_password as account-level custom values in HighLevel.
Part B — Receive inbound SMS in HighLevel
You’ll use a HighLevel Inbound Webhook trigger and set that URL in Mobile Message.
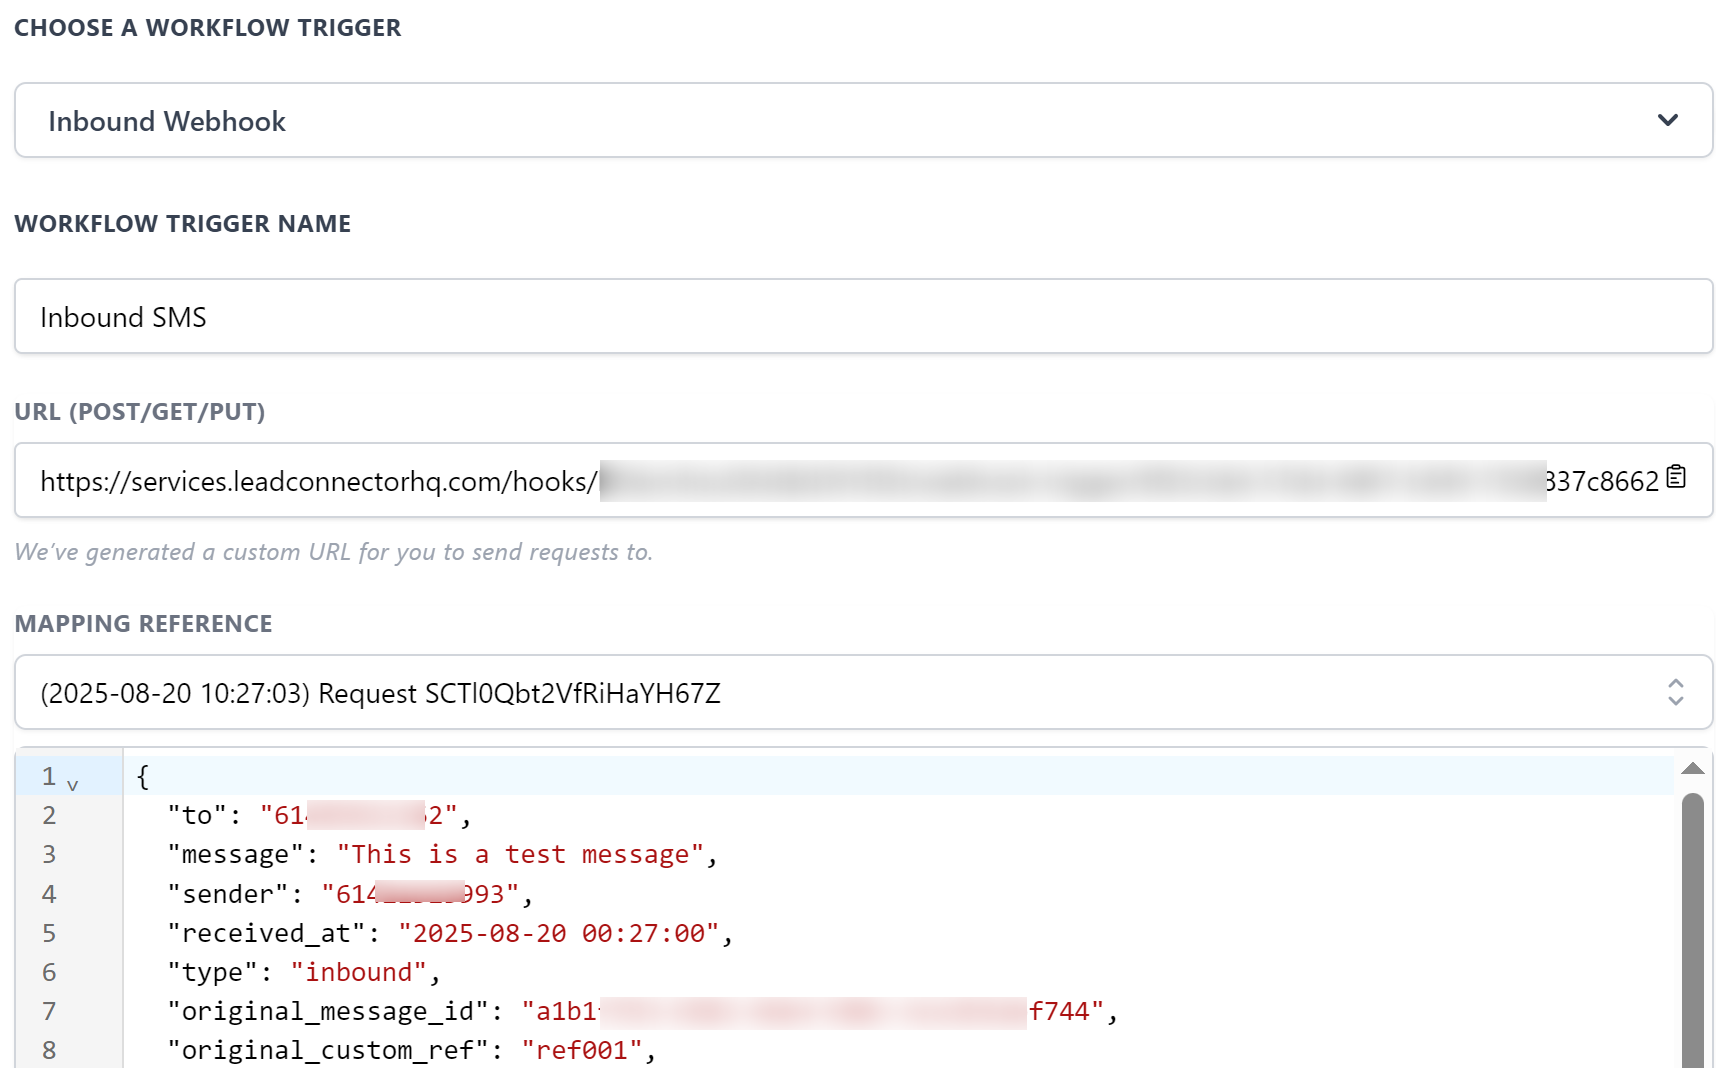
- Create an inbound workflow in HighLevel
Automations → Workflows → New → Add New Workflow Trigger → Inbound Webhook. Copy the webhook URL. - Point Mobile Message to HighLevel
In Mobile Message, go to Settings → API → Webhook URL for Inbound Messages. Paste the HighLevel webhook URL and save. - Send a test and map fields
Send a real test SMS to your Mobile Message dedicated number or reply to one of your outbound messages.
Back in HighLevel, use Fetch Sample Requests on the Inbound Webhook trigger, then map the fields you need (for example, from, to, message/body, received time). - Add post-trigger actions
Common steps:
- Create/Update Contact using the sender’s number.
- Add a Note to the contact with the message body.
- Notify your team (email, internal notification, Slack via another webhook).
- Optional auto-reply: add another Webhook action (GET) to call the Mobile Message simple API again with to set to the contact’s number and a reply message.
Part C — Delivery status updates (optional)
If you want delivery receipts to drive workflow actions:
- Create a second HighLevel workflow with an Inbound Webhook trigger and copy its URL.
- In Mobile Message, set Settings → API → Webhook URL for Message Status to that URL.
- In HighLevel, fetch a sample, map fields such as status, message_id, to, and custom_ref.
- Branch your actions based on status (for example, tag on delivered, notify on failed, add a note with the error).